The following ~ 2 min video demonstrates the use of Multiple Market Calls columns.
[arve url=”https://youtu.be/kSgcjJUHUxA” /]
Knowledge Base
[arve url=”https://youtu.be/kSgcjJUHUxA” /]
3rd party solutions/tools are referenced in this post.
Please review their Privacy/Terms pages.
To get started, here is what you will need.
The Video file should be hosted, e.g.; on YouTube, Vimeo or ANY file/video hosting service.
Once the Video is uploaded, you will have a web-link (URL) for your video. e.g.; www.youtube.com/myvideo
To add a cover photo for your video with a play button we recommend you use the following tool (or any similar tool)
…and click the “Generate Image” button.
The generated image is the file you will use to upload to Showroom Exchange.
Send yourself a test before executing the Final Send.
When reviewing the email addresses for the open/click/bounce stats of previously sent Personalized Bulk Emails (PBE’s), you can now enter a note or email reminder directly from the same page. See screenshot below.
This column works exactly as it does on the customer tab- the speech bubble with a green plus sign is used to add a note, hovering over the pink speech bubble will bring up a pop-up showing all notes for the customer, clicking the magnifying glass allows you to search through the customer’s notes with keywords.
This page is accessed by clicking on the number associated with different email stats. e.g.; opened, bounced.
Related: Personalized Bulk Email Tracking

There is a new manufacturer exclusion icon in the search row under the manage column. Clicking this icon will allow you to filter (or search) for your customers that are excluded from one, or several, of your manufacturers. Just check the mfr(s) you’d like to see all excluded customers for and click save.
If you’d like to only see customers without exclusions, there’s a checkbox at the bottom of the window labeled “Customers without a mfr exclusion” that you can select. Clicking save will show customers that are not excluded from any mfr.
Like all other forms of filtering and searching, this filter can be used with other column filters to make defined search lists. You can remove the search/filter by clicking “clear search”
Related: Exclude Manufacturers from Customer

Now when you try to enter an order for a customer with a manufacturer they have been excluded from, a warning will be displayed. This is to notify you of an existing exclusion for the specific customer/manufacturer combination and give you the opportunity to reconsider.
NOTE:
Users can still enter orders with a warning sign. The warning does not block the ability to enter orders.
RELATED: Mfr Exclusion
The warning appears on the add record page…

As well as on JSC

Admin users now have the ability to rename the default labels for the Ranking feature.
Now you can customize the purpose of the ranking feature while making its meaning clear to your whole team.
To customize your Ranking labels, click on the pencil next to “Ranking” at the top of the ranking column (as shown below). Enter your own labels and click save.

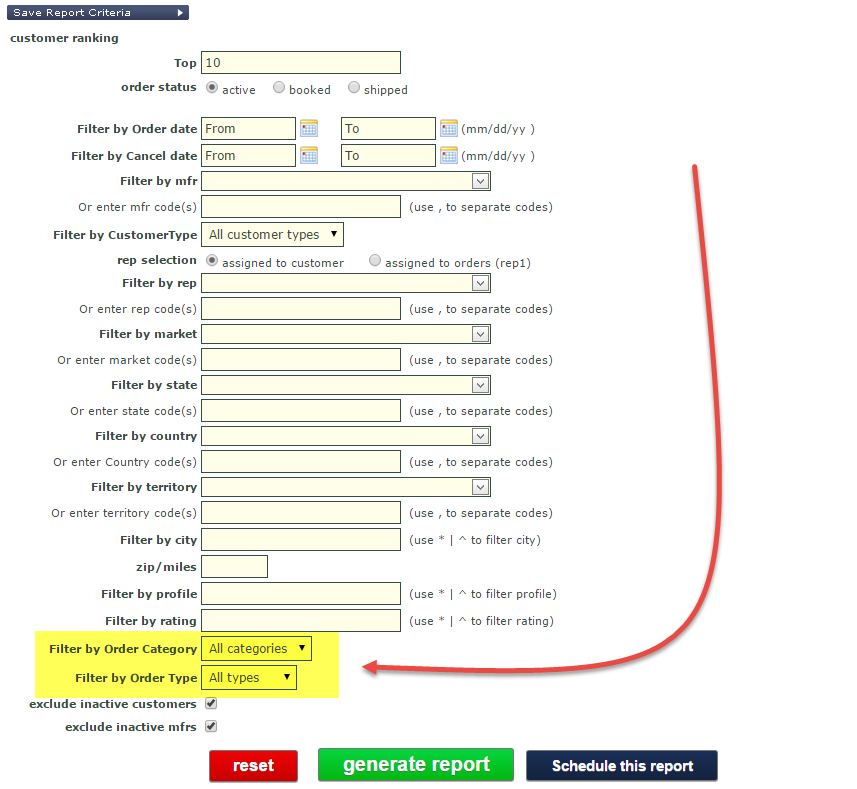
If you would like to further segment your orders, you can request to have the order type & order category feature to be activated (just reach out to us by emailing help@readytoview.com). Use this feature to differentiate your orders into categories (such as jewelry, men’s, etc.) and types (such as immediate, reorder, show, etc.).
Once you have the feature available to your showroom, establish your Order Categories and Order Types under “Setup Categories.”

Click “add record” to create new order categories/types.

When adding an order, you’ll be able to assign an order category, and optionally, an order type.
NOTE: Once this feature is activated, order category is mandatory while order type is not. If you only care to use one of these features, use order categories.

Once you enter your orders with order categories and/or order types, you can filter (or sort) your orders with these 2 new attributes.
You can also filter most report results by order type and order category. The following reports have this filtering ability:
Occasionally you may be asked by a member of the Showroom Exchange support staff to “clear JSC cache”.
The following video demonstrates the process of clearing the JSC cache.
Though the recorded video is on the Windows platform, the process is similar for Mac. You can access the Java control panel from “System Preferences.”
With the “Saved Searches” feature, you can save searches or views (selection of columns) you use frequently to save time having to re-enter them. This also enables you to view only those columns that are relevant to your active task.
This feature is available on the customer, order, invoice, credit memo, and notes tab.
To save a search, first make sure the current search is cleared by clicking “clear search.” Next use customize this view to select the columns you wish to show/hide. More on customize this view here. In the example below, I’m creating a custom view (choosing specific columns) for my market calls, so I’ve chosen to only see customer name, contact, phone number, last cancel date, mfr, and market call notes.

If you’d like to enter a specific search to save, or save a specific segment of your customers, enter the search (i.e. everyone in a certain territory, everyone who has purchased in the last year, etc.)
Clicked “Saved Searches,” then “add current search,” then enter a name for this view/search you will remember, such as “mkt calls.”

To load a saved search, open the “Saved Searches” drop down menu and click on the saved search label you are looking for. The page will reload with the saved column view and the search criteria originally entered.
Best Practice:
For every task you do repeatedly, have a saved search for it, whether it’s market calls, checking distribution, or sending emails. You could also have a “simple” view for quick viewing essential information and a “full/standard” view to see everything.