Another Click Saved!

Showroom exchange now allows you to login directly to your preferred page.
We have already set your profile to the customer view.
Follow these steps to change your preference:
1. Hover over “Setup Categories”
2. Click on “Settings”
3. Under “when I login, direct me to” choose preferred page


4. Click “Save my settings”

Reports Page

We have updated the reports view page in our ongoing efforts to make showroom exchange more user friendly.

So what’s new?

We have:
– simplified the title of all the reports
– added report descriptions (displayed on the right) to assist report selection
– grouped relevant reports

At the end of report descriptions, we have also included a reference to the old report name. e.g.; for Annual Sales by Month you will notice formerly: Sales Analysis by Year – Detailed

When your brands ask you for software recommendation…

We are often asked about ERP software recommendation for brands. Over time, we have collected links/references to different solutions.

NOTE:
This post is not an endorsement. We strongly recommend that each brand conducts its own review. We do offer our consultation services for selection and deployment.

Pacific Apparel:
http://www.pacificapparelsystems.com/

Vision-33:
http://www.vision-33.com/solutions/sap-business-one-for-apparel.aspx

Full Circle:
http://www.isllc.com/erp_solutions.html

Exenta:
https://www.exentago.com/

CGS Inc – BlueCherry:
http://www.cgsinc.com/solutions/bluecherry.html

Simparel:
http://www.simparel.com

N41:
http://www.n41.com


MORE HERE…

APPAREL’S SOFTWARE SCORECARD [Special Report]
PDF: APPAREL’S SOFTWARE SCORECARD

Guide to software and IT Solutions [Special Issue]
PDF: Guide to software and IT Solutions

Your Showroom Address on The Bottom of Outgoing e-Blasts (PBEs)

Showroom Exchange will continue to comply with the can-spam act (i.e.; Rules for e-mail marketing).

To further automate this compliance, effective immediately, your showroom’s physical address will be displayed at the footer of your marketing emails.

If you manually added your physical address to your marketing emails, please discontinue as it will cause duplication.

In accordance with the can-spam act, you must also follow these 3 points:
1. Don’t use false or misleading header information. Your “From,” “To,” “Reply-To,” and routing information, including the originating domain name and email address, must be accurate and identify the person or business who initiated the message.
2. Don’t use deceptive subject lines. The subject line must accurately reflect the content of the message.
3. Identify the message as an ad. The law gives you a lot of leeway in how to do this, but you must disclose clearly and conspicuously that your message is an advertisement.

For additional information on the can-spam act please visit the link below:
http://www.fcc.gov/guides/spam-unwanted-text-messages-and-email
http://en.wikipedia.org/wiki/CAN-SPAM_Act_of_2003
http://business.ftc.gov/documents/bus61-can-spam-act-compliance-guide-business
FCC

Have You Seen This Before?

While working with showroom exchange, you may receive the following message due to an error.

Please provide a brief description of what you were doing right before the error occurred. Your message along with the relevant data collected will help us look into the issue and work towards a solution.

Simply clicking on the Submit button will not be helpful.

Using Pinterest with your Personalized Bulk Emails?

Pinterest

Social Media marketing is more prominent than ever. In particular Pinterest can help promote your showroom brands and their collections.

Here’s how:

1- Pinterest is an extremely visual social media site where users can “pin” images and categorize them to specific “dashboards.”
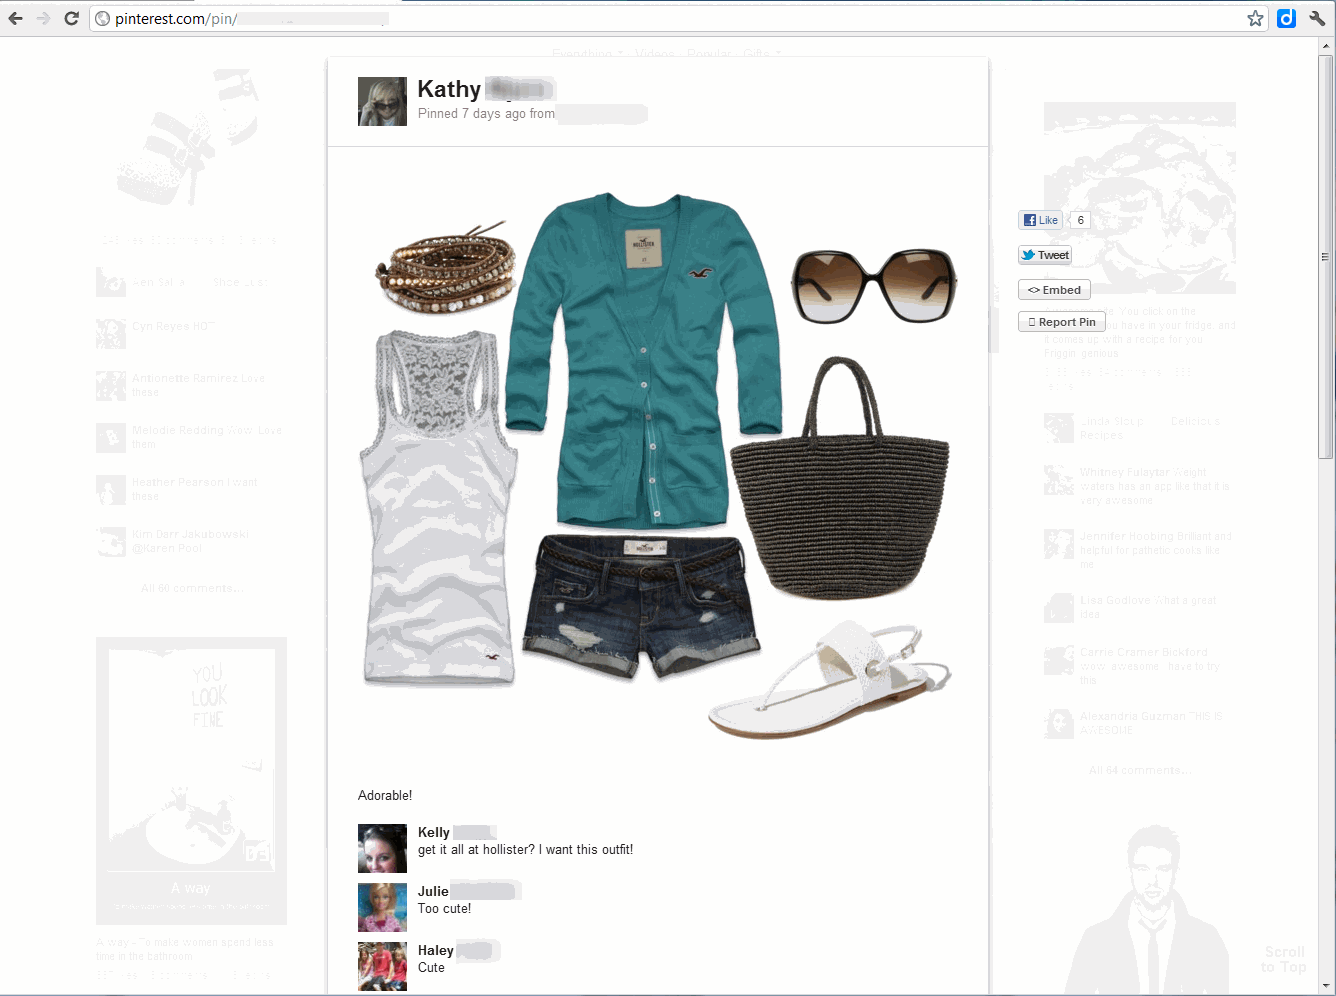
2- Showrooms can connect with buyers visually by creating “dashboards” for specific deliveries and or collections. (see screenshot below)
3- Showrooms can then use the dashboard link in a PBE (personalized bulk email) marketing campaign allowing buyers to see the items per specific delivery date. The images can be placed with additional information such as style #’s and price tags.

Pinterest is a great way for showrooms to quickly create an online catalog, look books or merchandising boards.

Click here to view a YouTube video: How to use Pinterest

Click below image to Enlarge a sample dashboard.

Pinterest

Updating Multiple Ratings and Profiles at Once

This new feature allows for updating of multiple customer ratings and profiles.

It can be made available only upon your request. To enable this feature, the showroom manager or owner must email help@readytoview.com.

Once the feature is enabled, on the customer page you will notice new “bomb” icons next to Profile and Rating. When clicked, the following popup with 3 options will appear:

Bomb Icon

1. FIND AND REPLACE:
If there are any matching ratings or profile entries, you can find and replace them. Select this option and click “Proceed”.

2. REPLACE ENTIRE FIELD CONTENTS:
This will overwrite anything that you have in rating or profile with the entry you specify. Select this option and click “Proceed”.

3. CLEAR ALL:
Based on your current search criteria, this will wipe the entire contents of the rating or profile fields. Select this option and click “Proceed”.

IMPORTANT: The above will only affect the customers listed in the current search criteria. If you would like to apply the update to ALL customers, confirm that the “clear search” is not shown in red and the customer status is set to all (i.e.; active and inactive).

Why the bomb icon?
This feature must be handled with caution and prior knowledge of the expected result.

The New and Improved Driving Directions

In the example below, we are planning a road trip to visit customers located in Beverly Hills. On the customer page, begin by searching for the targeted location. e.g. city search “Beverly Hills” or zip code with a specific number of miles in radius.

City Search

Next, click on the car icon under the manage section for the customer you like would to visit first. (NOTE: grayed out car icons do not have a valid address) If you do not see this icon, click on “customize this view” and make sure that “driving directions” is checked. Check and click “save selections” to enable the feature.

Car Icon

A pop-up driving directions will appear. Enter in your starting address. e.g. your showroom address (as you type, the address will auto-populate)

Starting Address

Next, drag as many customer store locations that you plan on visiting from the bottom rows to the top.

Drag Customers

As you re-arrange the top rows, you can choose either to go by a route convenient to you, or you can let showroom exchange decide the best route by clicking on “suggest a route for me.”

Refresh Icon

If clicked, showroom exchange will reorder your customers. You will receive a pop-up to confirm the new route or revert back to the original. If confirmed, you will then see an approximate estimate of the trip mileage. You can also get this by manually clicking on the refresh icon (a).

The next step is to configure your car’s MPG and the average price of gas you pay. Do so by click on the fuel gear icon, click “save” when completed. You will then see how much fuel your trip will cost.

MPG Gear Icon

Finally, click “calculate route” for your driving directions.

Map Icons

  1. Print directions
  2. Email directions
  3. Provide a link to the directions (instant message etc)

How Do I Delete a User-ID?

Important: Once an userId is deleted, so is the the history associated with it. Deleted userIds cannot be recovered. 

To delete a userId, please follow the steps below:

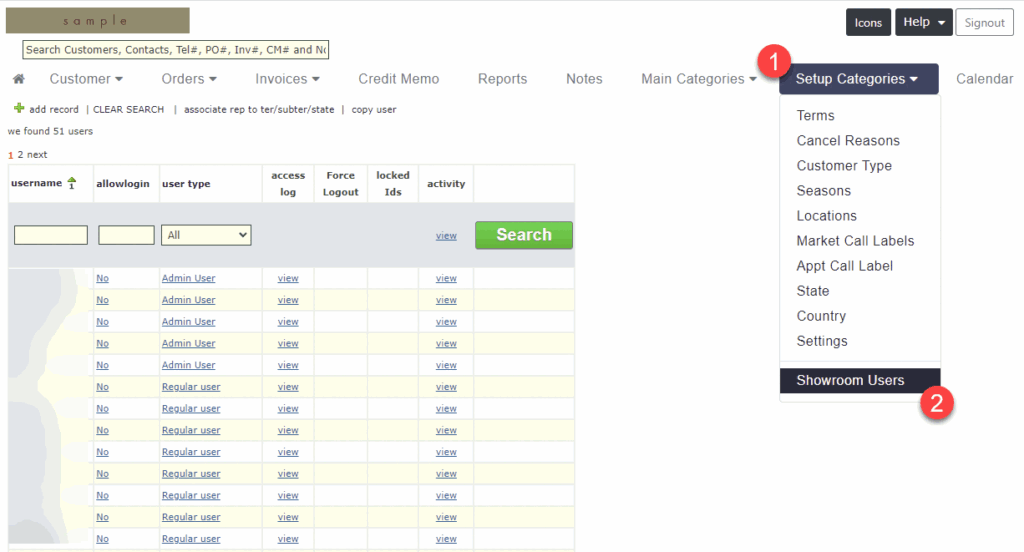
1. Hover over “Setup Categories” and choose “showroom users”


2. Click your Rep’s login userId that you would like to Delete

3. Scroll down and click on the red “delete” button. There will be a prompt to confirm, click “ok” to process the deletion.

The monthly billing reduction will be scheduled for your next invoice.

Fastest Way to Create a New User-ID is to Copy One

The quickest way to create a new user is to duplicate an exisiing one

Creating a new user will affect your monthly billing. Please refer to our pricing page prior to creating new users.
Showroom Exchange Pricing

To duplicate a current user, follow these steps. To create a new admin user, please email us at help@readytoview.com.

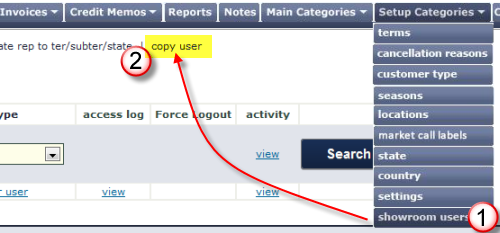
1. Hover over “Setup Categories” and click on “showroom users.”
2. Click on “copy user.”

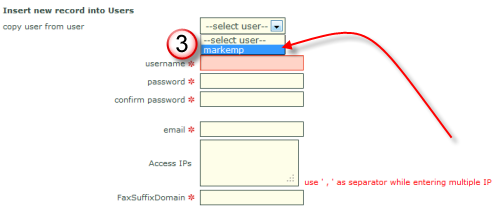
3. Select the user you want to copy permissions from.

4. Fill in all required information signified by the red asterisk.
5. Verify all applicable permissions
6. Once completed, click the green “Save” button.

A notification will be sent to us and your billing will be adjusted for the next month.