Where: Customer View/Tab
Why: SE can identify Customers/Retailers that are missing recent bookings for reach-out
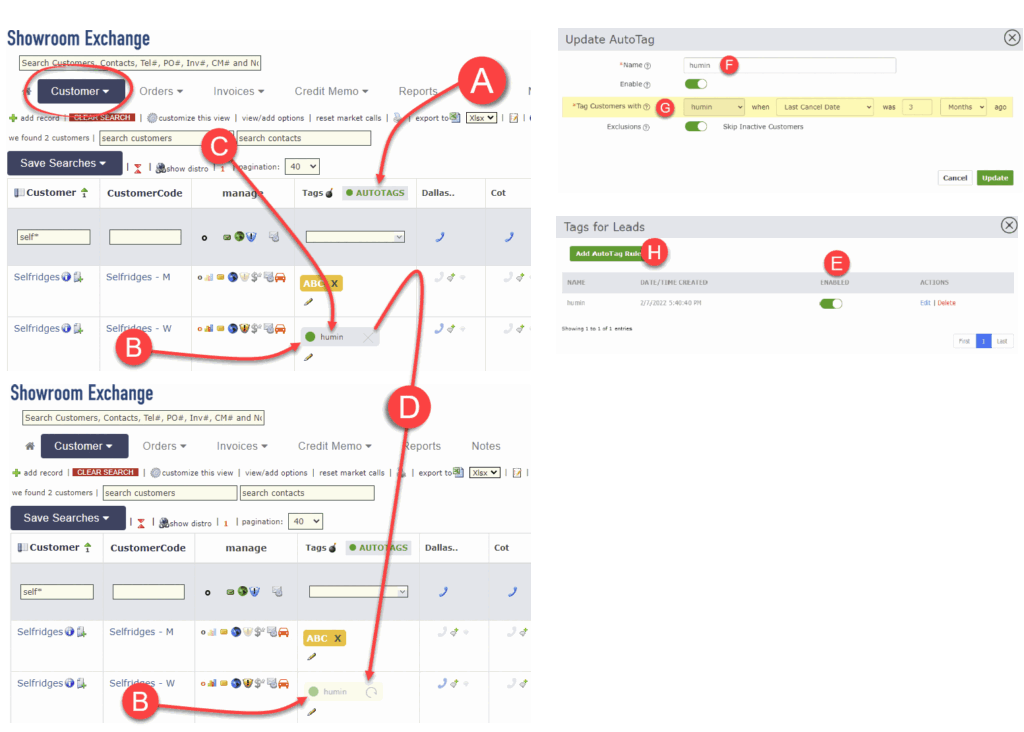
When a customer meets the conditions of an AutoTag rule you define, SE will tag them automatically. In below example, I have set up a rule where customers will be tagged when their last order of Humin was more than 3 months ago. Because my customer, Selfridges has not ordered Humin within 3 months, an Autotag appears, distinguishable from manual tags because of its green dot.
When a retailer/customer meets the rule conditions of an AutoTag (defined by you), they will be tagged automatically. In the example below, I have set up a rule where customers will be tagged when their last order of (mfr) Humin was more than 3 months ago. Because, Selfridges has not ordered Humin within 3 months, an AutoTag appears, distinguishable from manual tags because of its green dot and grey background.
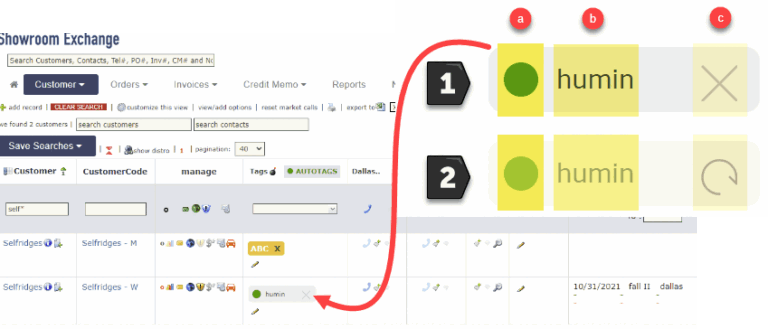
If this particular customer has been contacted, or this tag is no longer relevant (e.g.; Customer is skipping the season) the tag may be marked as Complete by clicking the X icon. The Completion status can also be undone, brought back to its active state by clicking the ↺

Additionally if the customer places a new order for Humin, the tag will be automatically marked as Complete.


How to use the AutoTag label:
After a Tag is assigned and when a new order (or an existing order is edited) satisfies the condition of the rule, the tag will be greyed-out (change its status from [1] to [2]). Reps can also overwrite/toggle the status from [1] to [2] (and vice versa) by clicking the X or ↺. An AutoTag in the [2]nd status indicates the customer has met the rep’s expectation.
Enabling AutoTags:
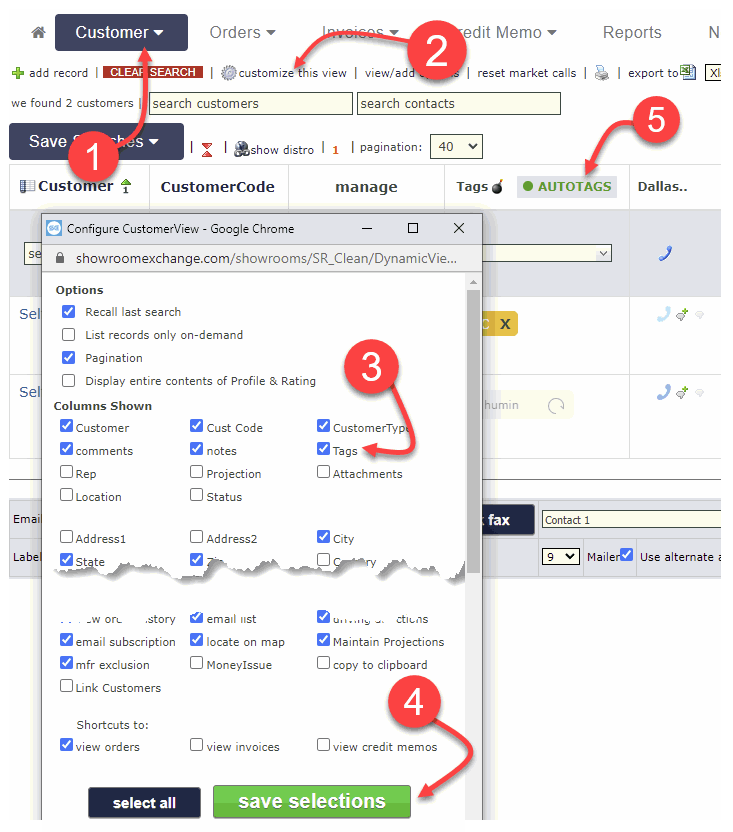
(1) from the customer tab
(2) click customize-this-view
(3) select the Tags checkbox
(4) click [save selections] button
(5) confirm that the Tags column is visible
Creating an AutoTag rule:
(A) AutoTags appear in the same column as rep-assigned Tags.
To create your 1st rule, click the [AutoTags] icon on the column header.
(H) Click the [Add AutoTag Rule] button and populate (F), the name of the rule and (G), the condition that should trigger the customer getting AutoTagged
Disabling an AutoTag rule:
(E) AutoTag Rules can be disabled by toggling them off. If disabled, existing tags will be removed.
NOTE:
AutoTags appear under the Tag columns. By clicking Here, your showroom can request for the column header caption “Tags” to be renamed to a caption of your own choosing, e.g.; “Leads”, “Targets”, etc.
IF THE TAGS COLUMN IS NOT VISIBLE, use customize this view to enable it.