Report Scheduling Reincarnated

This is a major improvement of our Report Scheduling tool.

What makes this special is the ability to use “relative dates” (aka. Multiple Periods), e.g.; Schedule a report “ONCE” to run (indefinitely) at the 1st of every month for the period of the preceding month.

Showroom Owners & Managers:
Relieve your reps & assistants from the task of generating reports for you on regular intervals. Showroom Exchange can do this for you.
You can now schedule automated reports within Showroom Exchange. Configure the settings once and have your reports emailed to you daily, weekly or monthly. The reports will be emailed to the address saved in your settings page. They will include a PDF and CSV/Excel link.


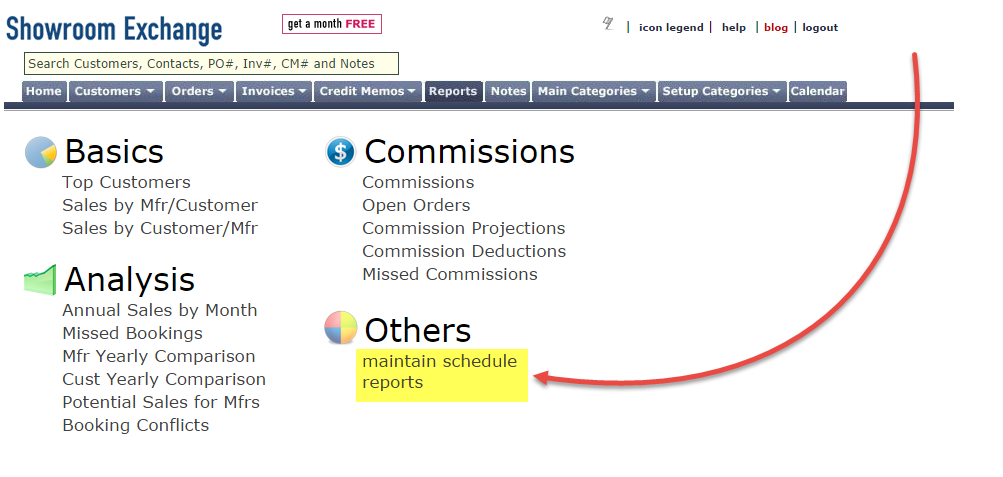
To schedule a report, enter report criteria/filters, then at the bottom of the report, click the “schedule this report” button.
Note: to use relative dates, date criteria entries are not considered for scheduled reports.


schedule report1


In the following pop-up, enter the title of the report (subject line of your email), then select the interval (frequency) of how often/how many times you want to receive the report.

schedule report


Daily, Weekly, and Monthly reports become more detailed as you can choose to make them examine a static period or multiple periods (relative dates).

Selecting a static period means that the reports will examine the same date range (either order date or cancel date) every time a report is run. This is not the preferred date-criteria selection as the same period will be considered for the report over and over again. e.g.; a report scheduled to analyze Jan 2014 generated in Feb 2014 or anytime in the future, will always consider Jan 2014 as the date filter.

With Multiple Periods, every time the report is generated, it will examine a different date range based on the interval and period you select. For example, if you schedule a recurring Daily report for 9 am, with multiple periods, looking at the “Previous period”, you will receive reports that analyze the previous day. i.e.; you arrive at your desk to find yesterday’s activity in your Inbox.

There are more examples below for Daily, Weekly, and Monthly scheduled reports.

The report below is configured to run on Mondays and Fridays of every other week, analyzing sales with cancel dates in the following week. It will run ten times before stopping.

schedule report4


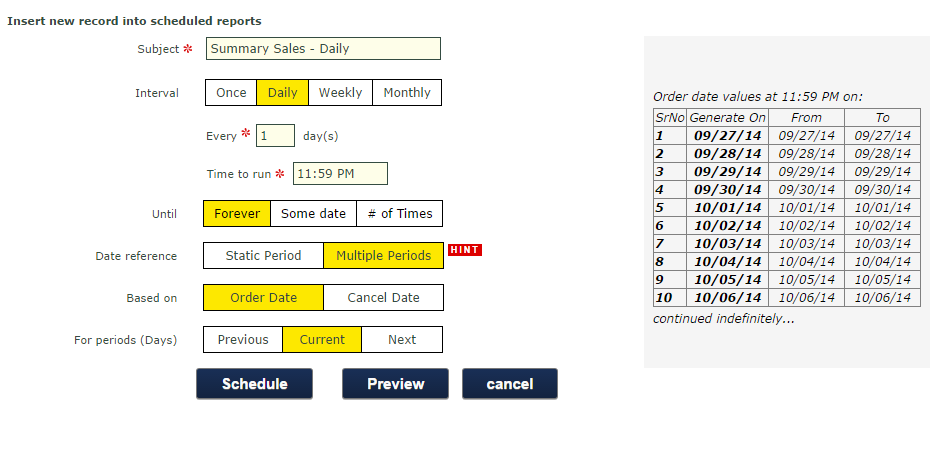
The example report below will run every day @ 11:59 PM forever, analyzing sales ordered on that day.

schedule report6


In the example below, the report will be generated on the first of every third month until 12/31/15 and will analyze sales with cancel dates in the previous month.

schedule report7


On the report page, click “maintain schedule reports” to delete or edit existing scheduled reports.

schedule report5

Annual Sales by Month Report Now Supports Missed Bookings

The annual sales by month report in its default form will only include customers that have orders for the specified year. e.g.; if [customer] Brasscactus has 2011 bookings but not 2012, the 2012 row would simply not show.

With the new “show missed customer bookings” checkbox enabled, now Brasscactus will be shown in the 2012 row with $0 bookings.

The highlighted fields below must be populated to enable the “show missed customer bookings” checkbox.

Show Missed Customers

Results with “show missed customer bookings” checked:

Show Missed Customers Checked

Results without “show missed customer bookings” checked:

Show Missed Customers Unchecked


Booking Conflicts Report

This report identifies customers with conflicting orders for the respective manufacturer and market within a specified cancel date range and miles radius of one other.

In this example, we’re searching for a list of customers in conflict with the following criteria:
– Their (mfr) luna orders have deliveries from 05/25/2012 thru 06/05/2012 (for any market)
– Within 0.5 miles of one another

Booking Conflict Configuration

Our results display 2 sets of conflicting customers. e.g.; Tiffany’s & Co, Greenapples are in conflict with Dream Scene.

Booking Conflict Results


Another Click Saved!

Showroom exchange now allows you to login directly to your preferred page.
We have already set your profile to the customer view.
Follow these steps to change your preference:
1. Hover over “Setup Categories”
2. Click on “Settings”
3. Under “when I login, direct me to” choose preferred page


4. Click “Save my settings”

Have You Seen This Before?

While working with showroom exchange, you may receive the following message due to an error.

Please provide a brief description of what you were doing right before the error occurred. Your message along with the relevant data collected will help us look into the issue and work towards a solution.

Simply clicking on the Submit button will not be helpful.

Updating Multiple Ratings and Profiles at Once

This new feature allows for updating of multiple customer ratings and profiles.

It can be made available only upon your request. To enable this feature, the showroom manager or owner must email help@readytoview.com.

Once the feature is enabled, on the customer page you will notice new “bomb” icons next to Profile and Rating. When clicked, the following popup with 3 options will appear:

Bomb Icon

1. FIND AND REPLACE:
If there are any matching ratings or profile entries, you can find and replace them. Select this option and click “Proceed”.

2. REPLACE ENTIRE FIELD CONTENTS:
This will overwrite anything that you have in rating or profile with the entry you specify. Select this option and click “Proceed”.

3. CLEAR ALL:
Based on your current search criteria, this will wipe the entire contents of the rating or profile fields. Select this option and click “Proceed”.

IMPORTANT: The above will only affect the customers listed in the current search criteria. If you would like to apply the update to ALL customers, confirm that the “clear search” is not shown in red and the customer status is set to all (i.e.; active and inactive).

Why the bomb icon?
This feature must be handled with caution and prior knowledge of the expected result.

The New and Improved Driving Directions

In the example below, we are planning a road trip to visit customers located in Beverly Hills. On the customer page, begin by searching for the targeted location. e.g. city search “Beverly Hills” or zip code with a specific number of miles in radius.

City Search

Next, click on the car icon under the manage section for the customer you like would to visit first. (NOTE: grayed out car icons do not have a valid address) If you do not see this icon, click on “customize this view” and make sure that “driving directions” is checked. Check and click “save selections” to enable the feature.

Car Icon

A pop-up driving directions will appear. Enter in your starting address. e.g. your showroom address (as you type, the address will auto-populate)

Starting Address

Next, drag as many customer store locations that you plan on visiting from the bottom rows to the top.

Drag Customers

As you re-arrange the top rows, you can choose either to go by a route convenient to you, or you can let showroom exchange decide the best route by clicking on “suggest a route for me.”

Refresh Icon

If clicked, showroom exchange will reorder your customers. You will receive a pop-up to confirm the new route or revert back to the original. If confirmed, you will then see an approximate estimate of the trip mileage. You can also get this by manually clicking on the refresh icon (a).

The next step is to configure your car’s MPG and the average price of gas you pay. Do so by click on the fuel gear icon, click “save” when completed. You will then see how much fuel your trip will cost.

MPG Gear Icon

Finally, click “calculate route” for your driving directions.

Map Icons

  1. Print directions
  2. Email directions
  3. Provide a link to the directions (instant message etc)

We Continue to Make SE More User Friendly

Had trouble finding buttons? It’s happened to us too! SE now has larger action buttons to expedite your next action. Don’t remember what a button does? SE is adding multiple hint boxes to quickly explain the functionality (e.g. zip code column search on customer view/tab). Not sure what something means? We decided to refresh the titles of many action labels to more natural language. (e.g. “list all” has been replaced by “clear search”)
Best of all, you won’t need to update anything for these new benefits.


Did we miss anything? Please let us know where improvements are still needed. email help@readytoview.com.


Thanks for your continued support.

We hope our improvements make you more comfortable  with showroom exchange.

The Fastest Search Method Available

If you are not using this feature already, try it once and you will you will be hooked. The search all feature shown below is a single field available on all pages. it will search all major content (orders, customers, contacts, invoices, notes) in showroom exchange based on your entry.

It’s a no brainer, just type in the mfr po, cust name, a note or invoice number and see the respective results on a popup moments after your entry. For more details, you may visit our previous post on this feature.

Single Search


Search All